How to Stain Your Deck Like a Pro
Who doesn’t love a freshly stained deck? Its uniform, smooth finish, and rich colour revitalises your whole outdoor space. But staining is not just about looking good on the outside. It’s about protecting your timber from the inside. The process of cleaning and staining your deck removes moss and mildew, protects the boards from warping, and prolongs the life of your timber.
Staining is a relatively easy DIY process. If you take your time and use the right products (and follow our tips!) you’ll get a beautiful, professional result that will make the most of your outdoor decking.
Read what you will learn in this article:
Guide for the best way to prepare and stain your deck.
1. Getting prepared for deck staining
If you’re new to home maintenance you may ask, “How often do I need to stain my deck?”, “Should I choose stain or oil?” and “What do I use to clean my deck?”
It depends on the age and condition of your deck and the look you’re going for. We’ll step you through these decisions and then tell you how to best clean and stain.
How often you need to stain depends on your use of the deck. If it’s a high-traffic area this will erode the stain faster. We recommend staining about once every 2-3 years to prevent warping and keep your deck looking its best.
Preparation is key to any job turning out well. The amount of cleaning and prep you need to do will depend on how old your deck is and what has been used on it before.
|
Deck age/condition |
Preparation required |
|
Brand new |
You either need to wait 8-12 weeks before staining for the weathering process to draw out tannins, oils and treatment, or you can use Cabot’s New Timber Prep to prep without the need to wait. Then follow with Cabot’s Deck Clean. Good news! You don’t need to sand new wood. Learn more about when you can stain your new timber deck. |
|
Greying, natural wood |
Scrub all the dirt and growth off your deck using Cabot’s Deck Clean. You may need to give your deck a sand, too. If you have rough burrs you will want to sand these down to a smooth finish. Otherwise, check if your wood needs a sand with the water-beading test. Sprinkle on some water. If the water is absorbed after a minute or two, you’re good to go. If the water stays beaded, you’ll need to strip and sand as your stain won’t penetrate the wood. |
|
Previously stained |
Cabot’s Aquadeck decking oil can be used on previously stained wood without sanding required. Although, final look will be impacted by the condition and colour of the existing coating. Learn more about Aquadeck decking oil colours and application. Otherwise, you will definitely need a good sand on the deck and for the best finish you will also need to use a Timber Stripper to get rid of all the old stain. If in doubt, strip it out! Then, continue with Cabot’s Deck Clean to complete your preparation. |
2. Choose your Decking Oil or Decking Stain
With all the options available, it can be difficult to know what’s right for you. For each option there are plenty of colours available to enhance your wood or give it a new colour. Whether you choose stain or oil, with a quality product and patient application you’ll get a fantastic result.
Decking oil vs stain
Decking Oil
An oil preserves the original colour of the wood, allowing you to see the grain and natural beauty of the timber. This is a common choice for premium hardwoods. If you like the finish of an oil, try Cabot’s Aquadeck or Cabot’s Natural Decking Oil.
Read more information on should you oil or stain your deck.
Deck Stain
Choose stain if you want to add colour to your deck. Or, if your wood is very weathered you may wish to use a stain to cover blemishes and add uniformity to the boards.
If you’ve chosen stain, you’ll need to decide on water or oil-based stain. Both have their advantages.

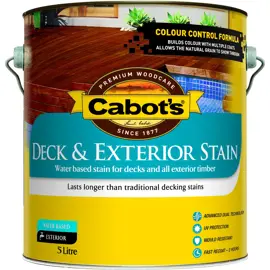
A water-based deck stain is easier to work with. Clean up with water rather than turps and there’s no strong solvent smell. The wait time between coats is shorter than with an oil base.

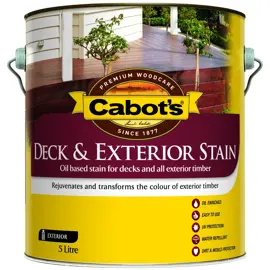
An oil-based deck stain penetrates deeper into the wood and lasts longer.
If you need help with the type and colour of stain, check out our Exterior Timber Project Guide or take a look at our #outdoorinspo images.
Read to find out the difference between decking stain and decking oil.
3. Gather your equipment
You will need:
- Your chosen decking stain
- Deck broom for preparation
- Cutting in brush
- Cabot’s Deck coat applicator or Cabot’s lambswool Deck sleeve
- Painter tray or deck bucket
- Paint pot for decanting
- Cabot’s New Timber Prep and/or Cabot’s Deck Clean
- Garden sprayer
- Hose
- Optional: sandpaper, drop sheets, rags for clean up
4. Scrub the deck
Once you’ve decided on your stain and got all the gear – it’s time to get to work.
- Start by removing plants, furniture, toys and anything else from the deck. Place drop cloths over items that can’t be moved.
- Give your deck a good once over with hot, soapy water and a stiff broom.
- Then, follow the instructions on the timber stripper, Cabot’s New Timber Prep or Cabot’s Deck Clean.
- Remove excess water with a squeegee and wait at least an hour before applying stain.
Read Easy Guide on How to Clean a Deck for more information.
5. Applying your Stain
Like most outdoor activities, you need to wait for a good staining day. Not too cold or hot, but unlike Goldilocks’ porridge, it doesn’t have to be perfect. For an easy answer, check out our Decking Forecast to see if it’s a good staining day in your area.
If you’ve cleaned and prepped the day or weekend before, you can get up early and get a coat in before it gets too hot. This helps prevent your stain from drying too quickly and allows you to blend sections for an even finish.
Gather everything you need before you start including a hat and water bottle. You don’t want to be traipsing through the house once you’ve started.
Plan the attack. Figure out the sequence of staining so you don’t paint yourself into a corner, literally. Start with upright railings then cut in your edges and, finally, the main boards.
Start staining
- Tape edges like you would when painting. You don’t want stain where you didn’t intend for it to go.
- Open the stain and stir. You’ll need to regularly stir your stain before you pour into the painter tray or deck bucket.
- Stain in the order recommended above. Aim for thin, even coats. You don’t want stain building up and looking patchy when dry (follow the spread rate advice on back of product pack).
Wait time between coats
- Water based stain: Wait around 2 hours before applying the second coat.
- Oil based stain: Wait until the first coat is completely dry before applying the second coat, around 6 hours.
- When you’re done staining, wait at least 24 hours before replacing furniture, plants and using your deck as normal.
Please note: Read the individual product information on the label for wait time.
Read more information on how to coat your deck in cold weather.
Need more help?
- Use our Decking Forecast to find out if it’s the right day to stain your deck
- Find out more about preparing and applying your chosen Cabot’s Decking product
- Grab all the accessories you need to stain like a pro
- If you get stuck or need advice on your project, contact our Help and Advice team at 0800 222 687 or Live Chat via website.